How to Create a Rain Garden Planter
Learn how to create a rain garden planter that slows the flow of rain and mitigates the effects of climate change
How to Create a Rain Garden Planter
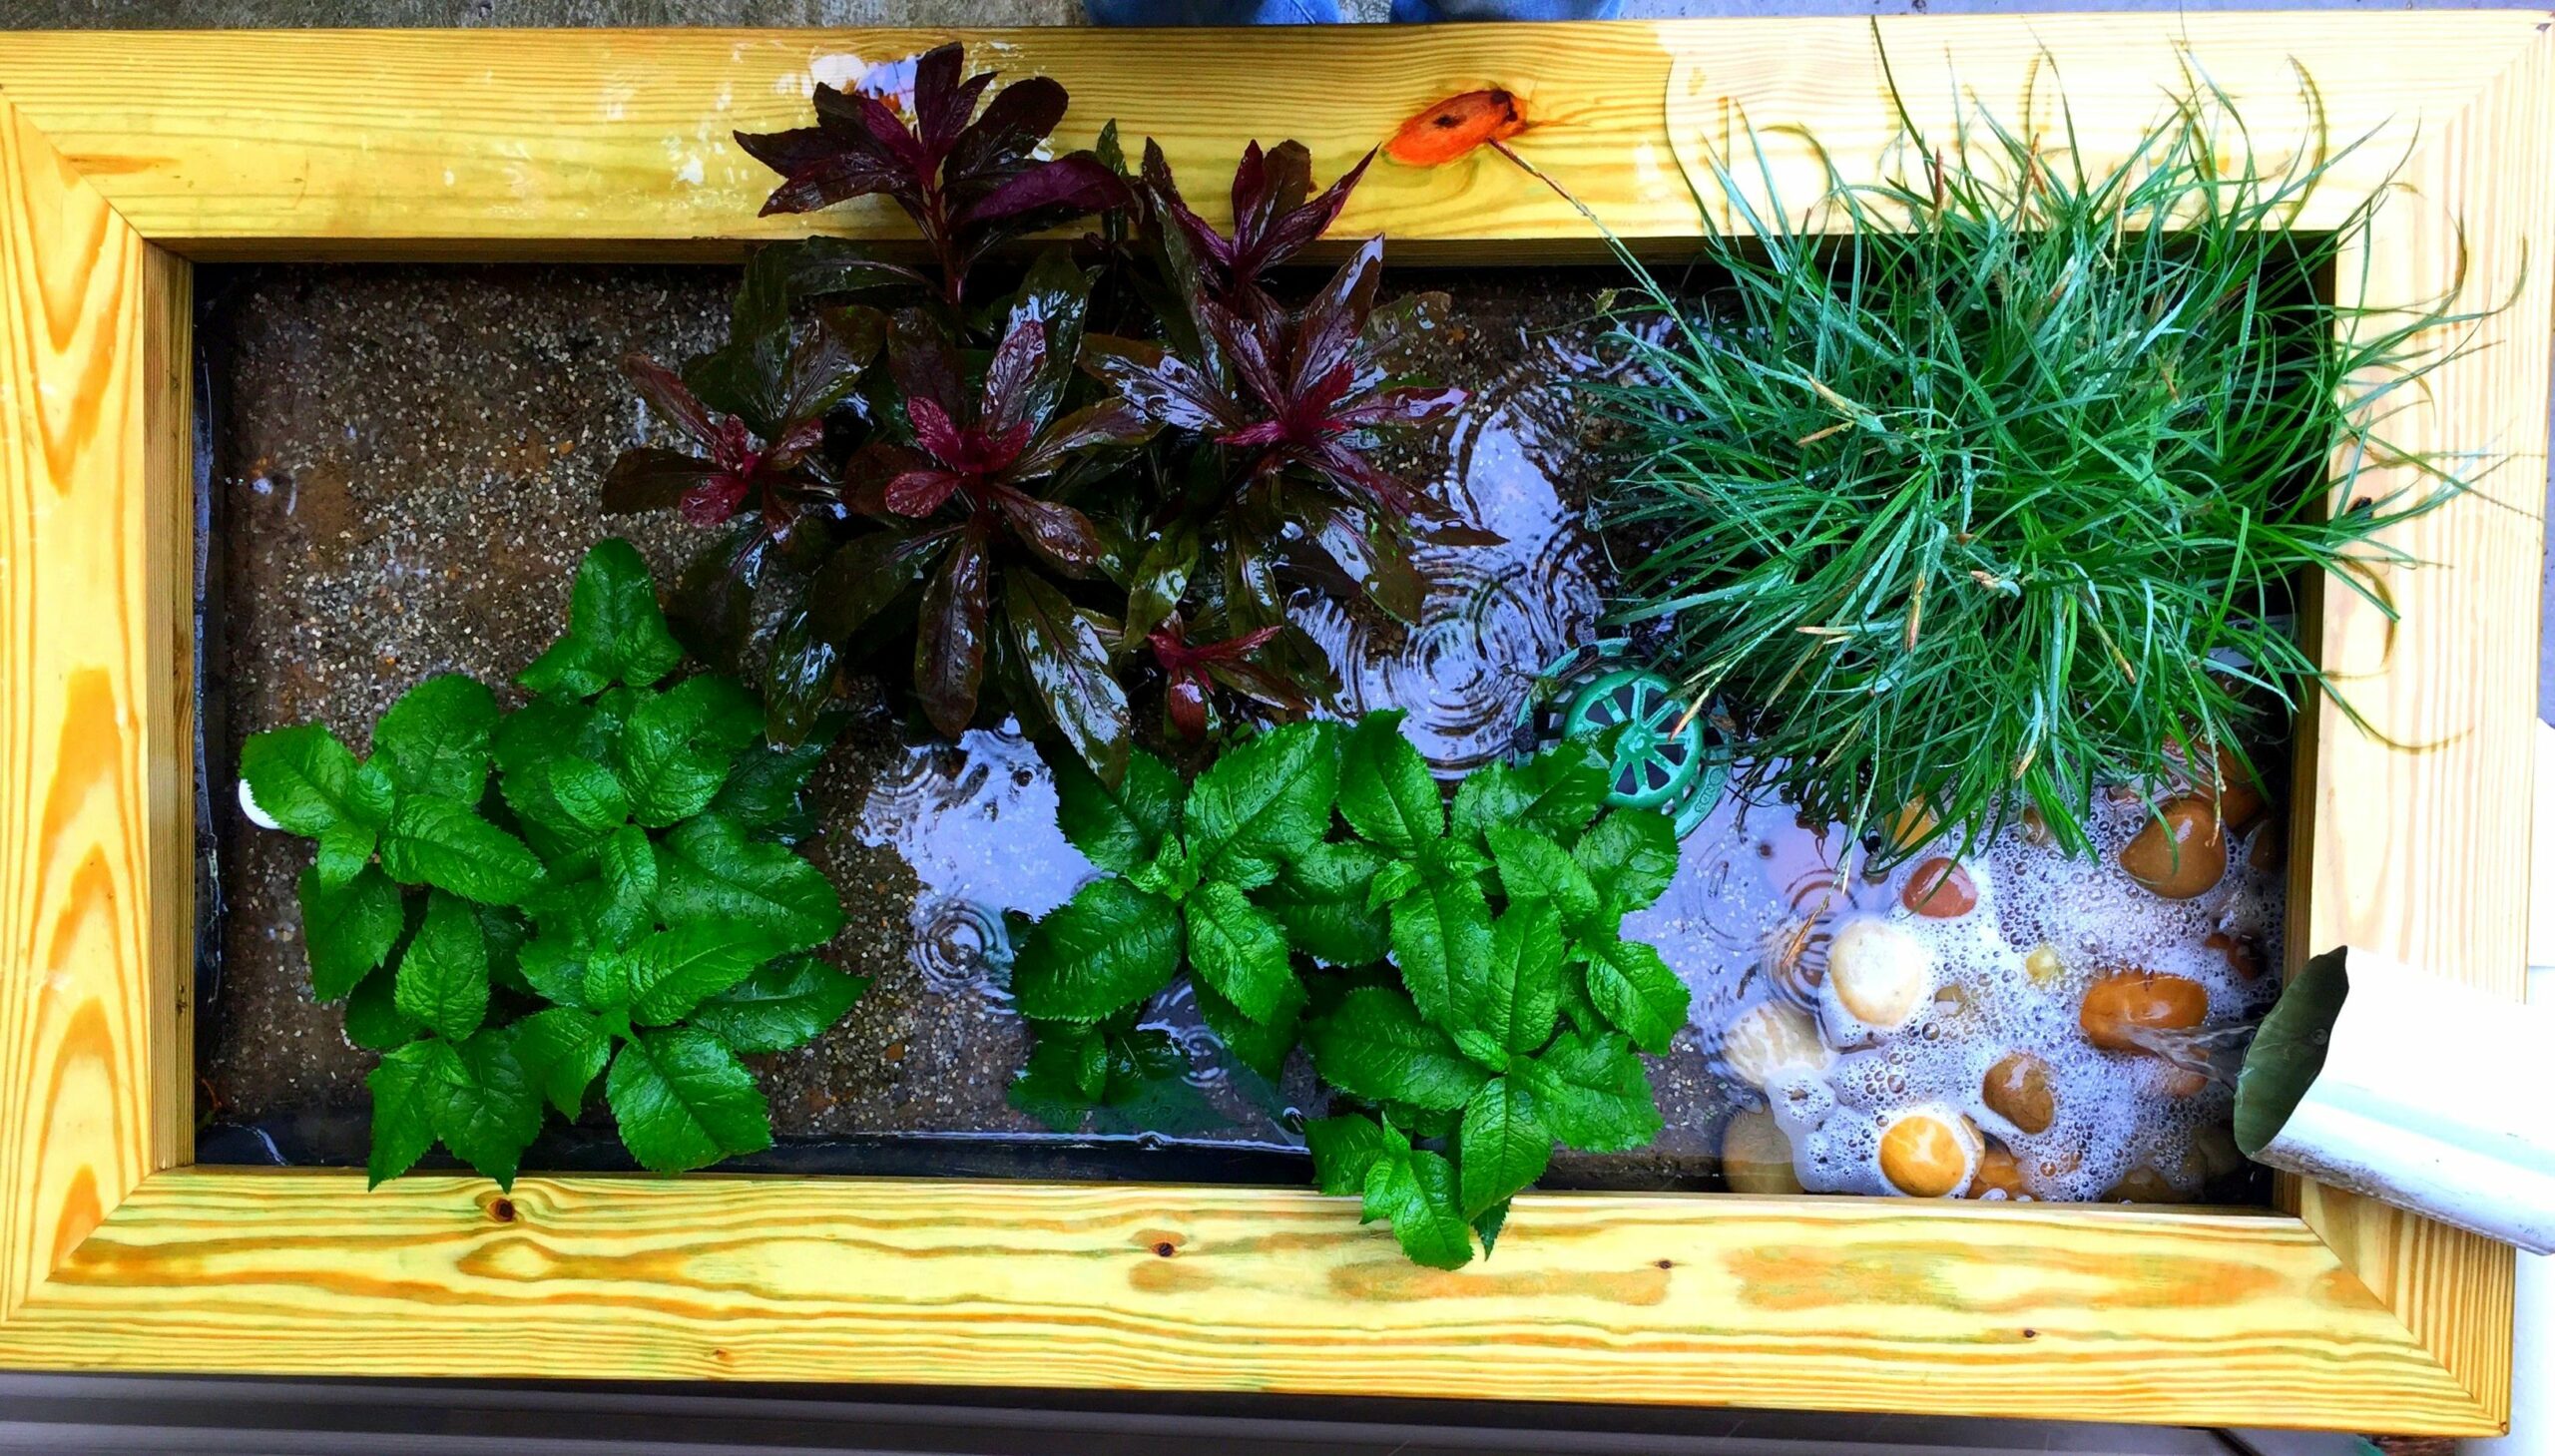
Rain garden planters provide habitats for insects and wildlife, capture excess rainwater to prevent flooding and filter out pollutants to keep our water clean! With so many benefits, it’s easy to see why they are becoming a lot more popular in our towns and cities.
Here’s how to make your own:
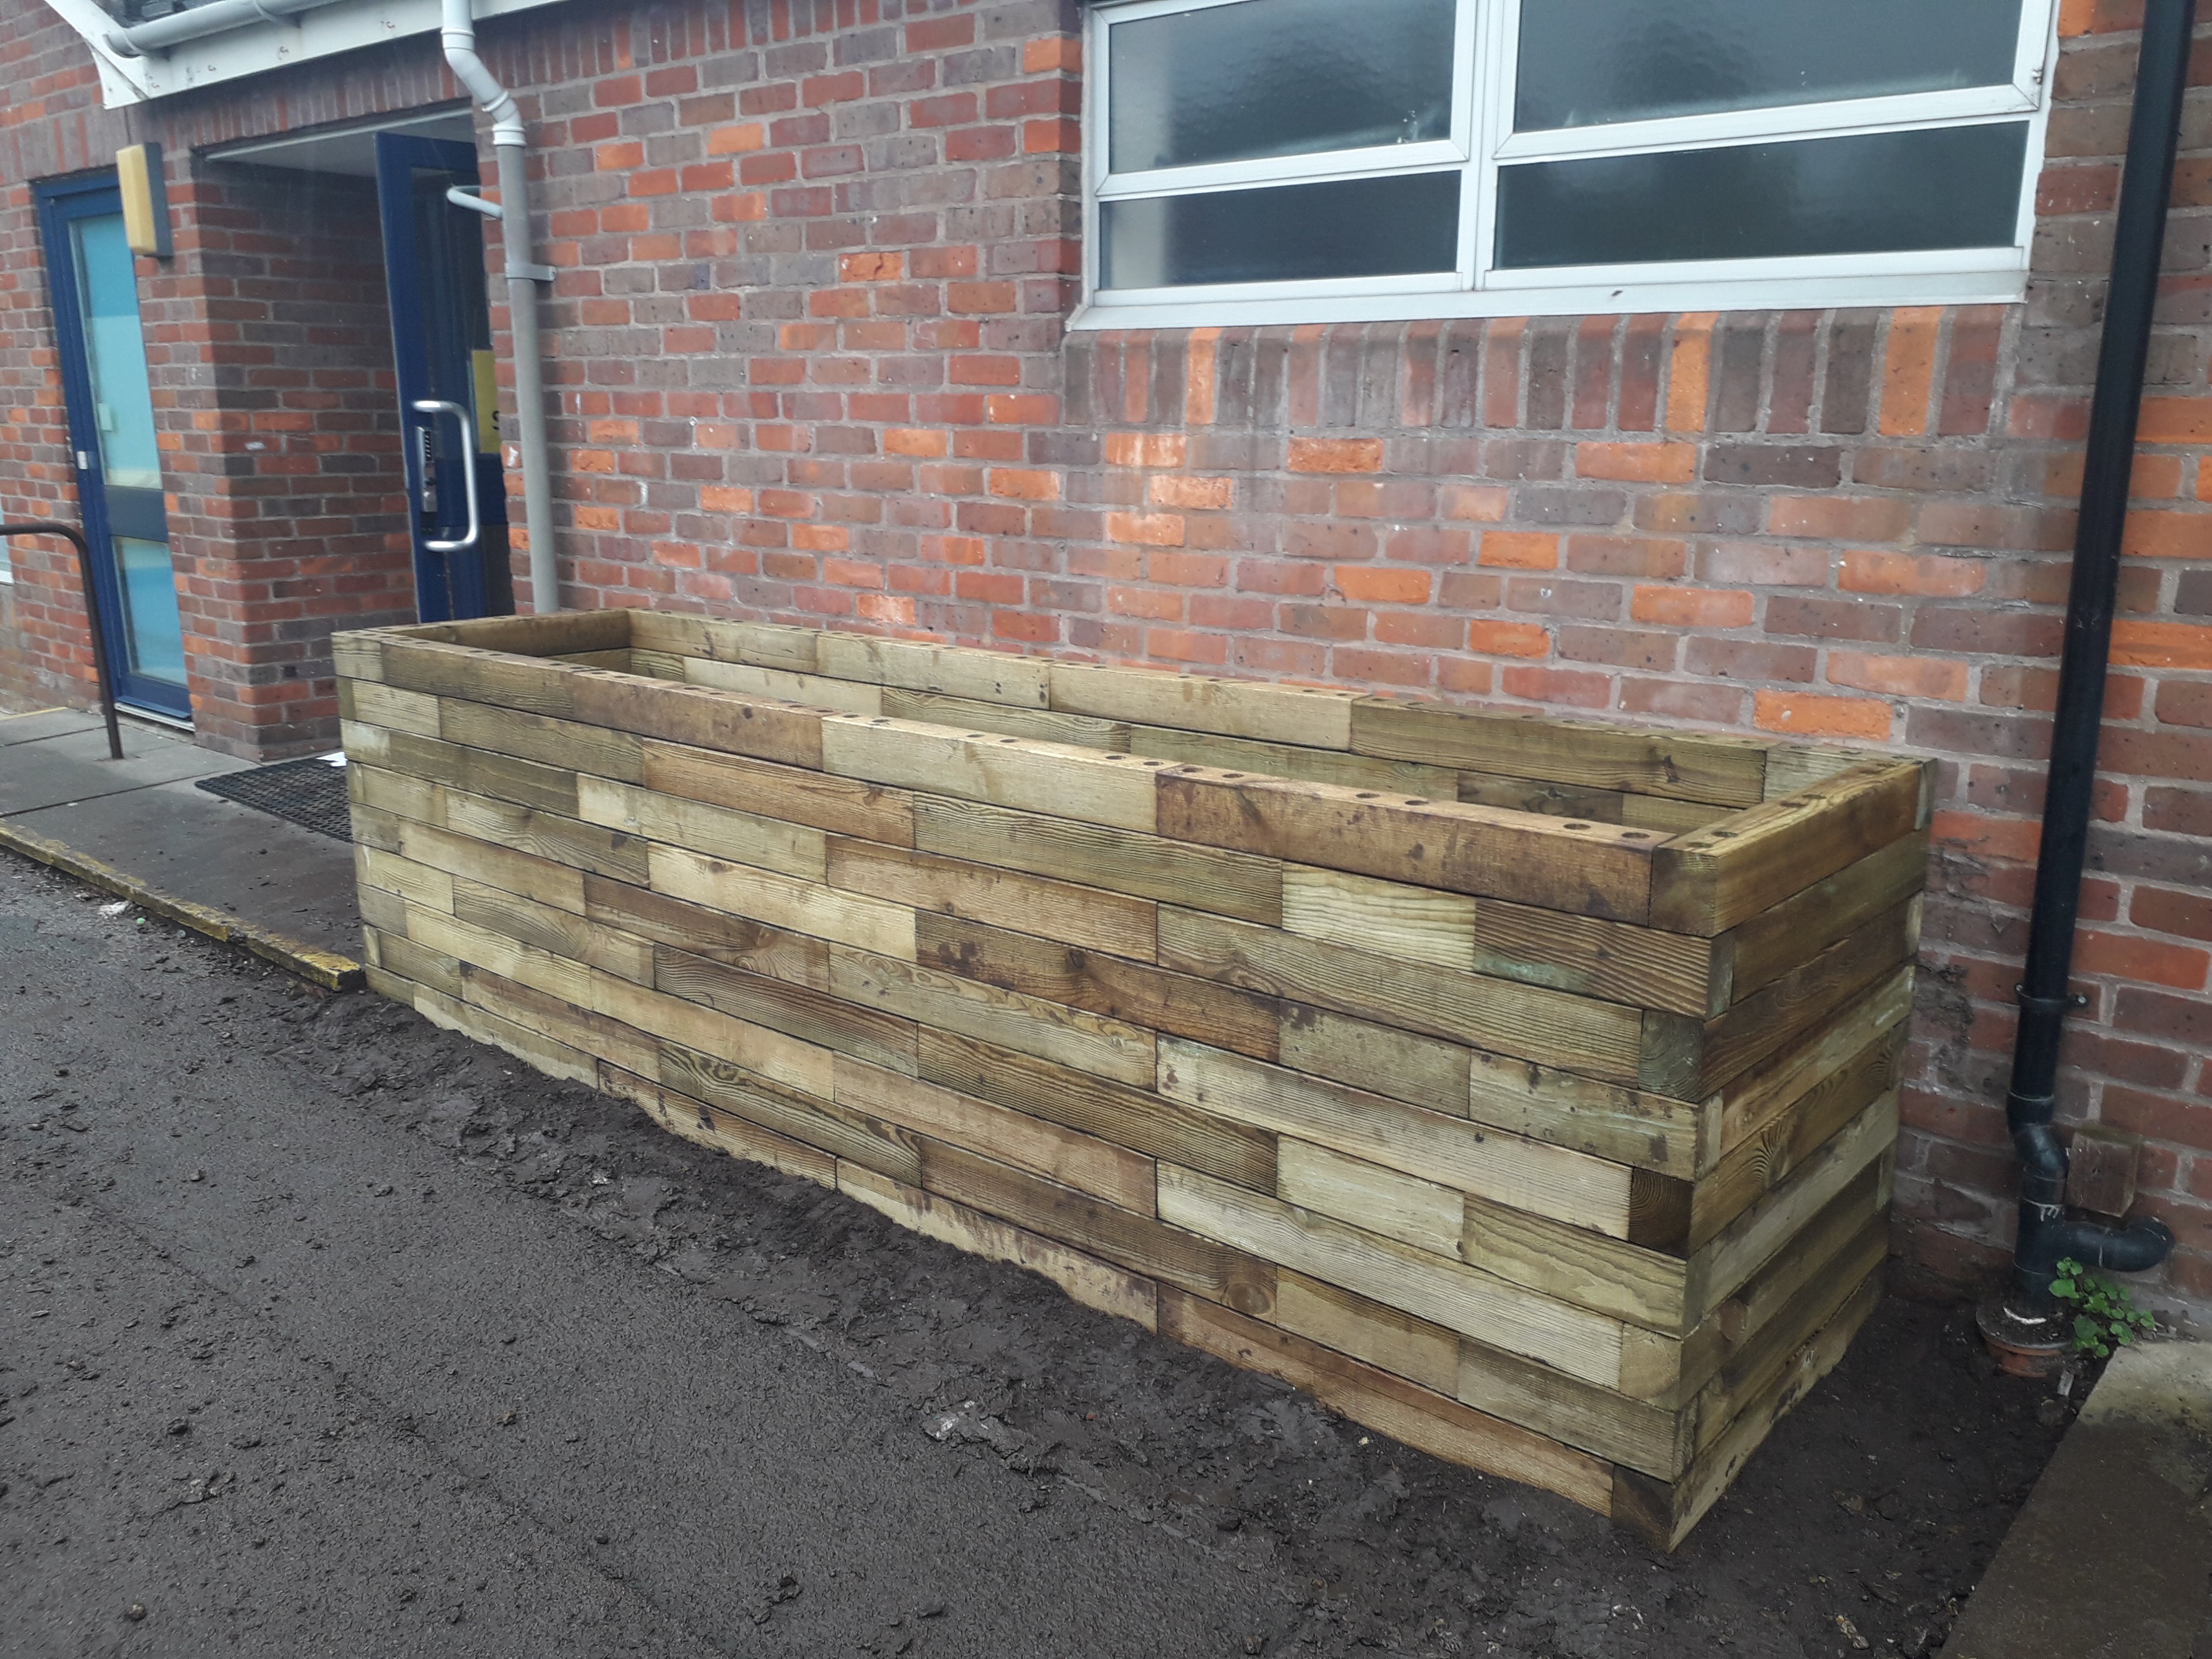
1. Prepare your planter
You can use the above measurements if you are building your own planter, but it’s also possible to source ready-made ones from garden centres and online. Measure the location where your planter will be first, to check there is room for it to be positioned to drain into the existing drain. Drill a hole in the side or end of your planter using a flat head bit or hole-saw. The plastic drainage pipe will need to go through this hole so position it accordingly. Drill some drainage holes in the base to prevent rot.
2. Line the planter
Make sure your planter is watertight by lining it with some robust plastic sheeting or PVC pond liner, allowing plenty of room for the liner to stretch. Fix it in place with staples or by adding a strip of timber (wooden batten) along the top edge. Make a small hole in the liner by your planter’s drainage hole which the drainage pipe will go through.

3. Get the pipes ready!
Drill small holes in your horizontal drainage pipe, (smaller than gravel so it doesn’t fall into and block your pipe). This pipe will sit at the bottom of your planter. Check all your pipework fits together as shown in the diagram below. Move the planter into its final location and stand it on bearers/wooden frame.

4. Start filling it up!
Add some gravel to the base of your planter and position the slotted pipe so that it drains down towards the outlet. Push the drainage pipe through the liner and connect up the overflow pipe. Seal up your pipes with silicon and tape. Add the remaining gravel to cover the pipes and top with permeable membrane to stop rainwater washing the soil out. Add a layer of sand and then fill with a mix of soil/compost to sand in the ratio 4:1.
5. Aim the downpipe
Cut off or divert the downpipe from the roof to flow into your raingarden planter. You may need to add a downpipe shoe to direct the water correctly. Placing large stones below the spout will prevent splashing and will help to filter debris.
6. Get planting:
Plant with a variety of hardy perennial plants which can tolerate dry periods as well as short periods of flooding. Choose a mix of plants which can provide interest year-round and help to attract pollinators.
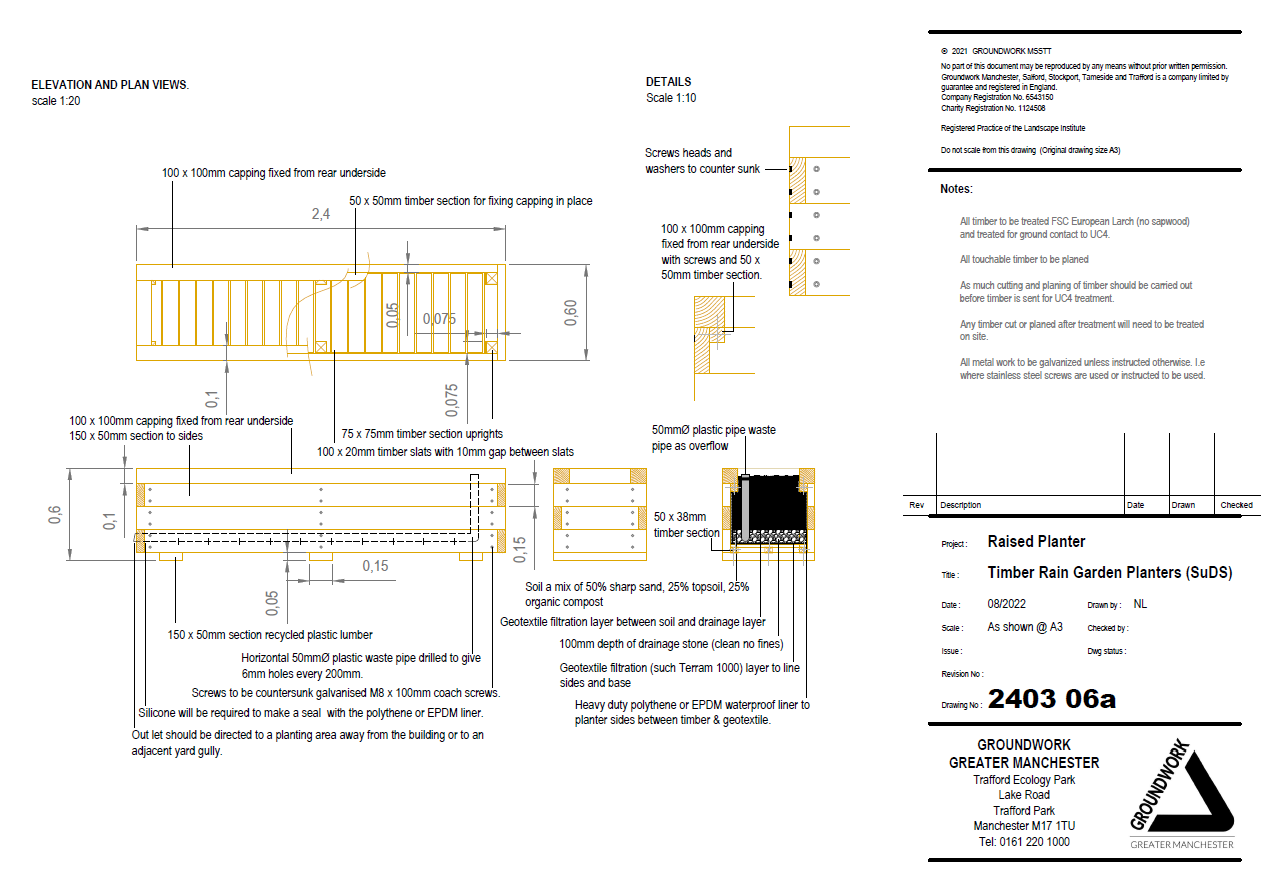
Here’s a recent technical drawing from Groundwork’s Landscape Architects detailing how to construct a rain garden planter:
Other things you may be interested in
Mini Forest Living Pallet Wall Green Roof
Stay connected
If you’re feeling inspired to now create your very own Green Roof, make sure you let us know on social media! Stay tuned for exciting projects on the horizon.
Facebook Twitter LinkedIn Instagram
If you’d like to speak to a member of our landscape or communities team about implementing something similar in your community, don’t hesitate to get in touch: